Get Rid Of Clutter: 10 Things That Should NOT Be In Your …

This is a guest post from Karen, a friend of mine, whose cynical views on things always make me laugh. I hope you enjoy it!

Closet … Bathroom … Kitchen

We’ve all been there. We want to organize our home but we have no storage space. Or do we?

If you get rid of clutter and ensure closets and cabinets only contain items relevant to their location, you will find you have more storage space than you thought.


10 Things that should NOT be in your closet

Closets can be scary places. If you don’t think so, just ask Boo from Disney’s “Monster’s Inc.”. OK, so there’s not really going to be any monsters coming out of there, but there might be plenty of things that might fall on you if you don’t open the door just right.

Make more space and stop the avalanche by removing the things that just don’t belong, such as:

Dirty clothes

  1. Dirty clothes. Wash them, already!
  2. Clothes that don’t fit. Come on, do you really think you’ll fit into them again? And even if you do, you know you’re going to reward yourself with new clothes anyway.
  3. Anything you don’t love or need such as the tacky sweater Aunt Gussie sent for Christmas. Either give it to someone who won’t think it’s tacky (say someone in the local old-folks home) or keep it in the garage and use it to wax the car. Ok, that’s a bit harsh, but at least you’d be putting the gift to good use.
  4. Things you’ve got more than one of. Do you really need 10 grey sweaters or 10 white t-shirts?
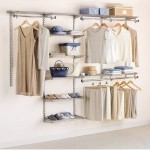
  5. Items that aren’t yours. It’s really time to give that great blouse back to your friend before she never lends you anything again. Or do you have your kids clothes in your closet? If so, get them their own closet organizer. Rubbermaid closet systems start at only $50.
  6. Clothes that no longer fit your lifestyle. Did you used to work in an office but now don’t? Move those work clothes out to create more space.
  7. Mismatched items. Did you buy a great skirt but have no blouse to go with it? Either buy one or ditch the skirt.
  8. Worn out shoes. Trash them. Hey, what better excuse to get new shoes? Now there’s something that does belong in the closet, along with a shoe rack.
  9. Sheets and blankets. They belong in a linen chest or an under the bed storage box.
  10. Anything you can’t wear.
    • Sports equipment – get a tub and put it in the garage or the basement. You surely won’t need a goalie mask for, um, whatever happens in the bedroom will you????
    • Christmas presents you bought last year and then couldn’t remember where you put them or even that you had them. Come on, you’ve done it, too. But when you do find them, put them somewhere you won’t forget about them.
    • Kitchen appliances you don’t have cabinet space for. “Yes, I’d be happy to whip up a batch of smoothies if you’ll go get the blender out of my closet. It’s behind my Vera Bradley tote bag.” Paahhhlllleeeeeesssss.


10 Things that DON’T belong in the bathroom

The old nursery rhyme goes, ‘Rub-a-dub-dub three men in a tub’. Awkward! Three men do not belong in one tub – or even in the bathroom for that matter (unless it’s a public restroom, of course). And here are a few other things that don’t belong in the bathroom either.

Bathroom

  1. Your library. Reading material in the bathroom – not a big fan. Just do your business and get out.
  2. Dirty laundry. Take it off, drop it in the hamper and shower.
  3. Six bottles of shampoo, four of conditioner and four or five different body washes. Nobody gets that dirty and nobody’s hair can be that dirty. If you buy it, try it and don’t like it – get rid of it. If you buy it, try it and like it – stick with it. Keep any bulk purchases in the garage or basement though.
  4. Oodles of expired make-up and barely useable tubes of lipstick. Toss what you don’t use. If you wore it to prom or your office Christmas party two years ago, throw it out!
  5. Jewelry. It will either get dropped and lost down the sink or will get damp and tarnished. Either way get it out into your bedroom.
  6. Hair. Hair belongs on your head. After doing your hair wipe it up off the floor, sink and counter tops and put it in the trash. Nobody enjoys sharing a bathroom with a shedding wooly mammoth.
  7. Plugged in hair dryers, curling irons or straightening irons; be safe and move them to your bedroom.
  8. Pictures or other cutesy décor – all it does is gather moisture from the shower and collect dust. But on the other hand, all that dust sure will make your allergies happy as a clam.
  9. Floral scented bathroom deodorizers. Well, really any of those spray deodorizers. The scent of roses or lilacs mixed with you-know-what is enough to make anyone toss their cookies.
  10. Your kids. When you’re in there trying to catch a break, lock the door, plug your ears and let somebody else be in charge for a little while. You deserve it!


There’s WHAT in the Kitchen? 10 things that shouldn’t be

The kitchen is often the hub for the family’s comings and goings. It’s where permission slips are signed, where the dog seems to think her squeaky toys belong, where everything that needs a button sewn back on waits hopefully, where science experiments are grown and maybe, just maybe, you prepare meals for your family (if there’s room for you to cook, that is).

Room for cooking wouldn’t be a problem, you know, if you’d get rid of the things that don’t belong in your kitchen.

Coupons

  1. Dirty dishes. That thing called a ‘dishwasher’ really does wash and clean the dishes. All you have to do is push the button.
  2. Leftovers – from last Thanksgiving or more than two or three days ago, unless they’re labelled and in the freezer.
  3. Coupons. But, you ask, where else should they be? They should be in the register drawer at the grocery store because you used them! That’s where they should be! If you’re not going to use them don’t clip them and leave them to clutter up your countertops and drawers.
  4. Family paperwork, like those permission slips. The only exception to this is if you hang a ‘family central’ bulletin board in the kitchen for such items.
  5. The mail. Sort it, toss the junk and put bills and other important documents in a designated desk drawer or other home office area. It’s neither professional nor appropriate to send your utility bill in with a fruit snack stuck to the back of it.
  6. Dust balls the size of basketballs on top of and behind your refrigerator. It doesn’t take long to swipe through these places a couple of times a month or so.
  7. The toys your kids just couldn’t put down long enough to eat breakfast. Funny though, they sure don’t exhibit any separation anxiety issues when you ask them to take them off the table.
  8. Hair bows, hair clips, pony tail holders, combs, brushes – really?
  9. Pet beds and/or litter boxes. If you need an explanation on this one, well, let’s just say I’m sure my dinner invitation will get lost in the mail.
  10. In short, if you aren’t going to eat it or with it or use it to prepare something to eat, it doesn’t belong in the kitchen.

Ok, so quit reading about how to organize your home and get rid of those things in your closet/bathroom/kitchen that don’t belong.

Chloe says: I had a quick scout round my closet/bathroom/kitchen and came up with the following out of place items. Suncream in the kitchen, a sleeping bag in the bedroom closet (taking up a whole shelf!) and a Gameboy in the bathroom cabinet (I wondered where that had gone!). Please let me know what you find.

Photo credits: H.A.M. Phtgrphy, Elizabeth/Table4Five and Lomo-Cam.

Shoe Racks For Closets: What Every Shoe Lover Needs To Know

We all have too many shoes. According to Reuters Life, most of us own 19 pairs, but how many are well organized?

Funnily enough, it is far more pleasurable to buy shoes than it is to organize them. But given shoe racks for closets probably cost less than one pair of shoes, will protect our precious purchases and save us time and stress sorting through shoe piles, we really ought to make the effort.

Remember a shoe rack organizer probably costs less than one pair of shoes.

So what is the best option for closet shoe storage?

Inside this guide you will find:


In a rush? Quick overview

Shoe racks for closets are a must have for shoe lovers. Anyone with more than a few pairs of shoes will know the chaos that they can create on your closet floor.

So get organized, save space and time looking for that elusive pair and keep your shoes in tip top condition.

There are 12 different types of shoe organizers which can be categorized as freestanding, over the door and hanging. Each has its own set of pros and cons. The current state of your closet will dictate which style you should buy. They vary in price from $10-$80 and will hold anywhere from 3-50 pairs of shoes.

Counting how many pairs of shoes you actually have and comparing the measurements of your closet to the dimensions of the rack are key things to do when choosing which one to buy. Other considerations include style, weight, ease of installation and versatility.

Before you begin to organize your shoes, you really need to declutter. So take 10 minutes, grab all those pairs you never wear and donate them to a worthy cause. After choosing a rack, sort your shoes into those worn most often and those worn infrequently. Keep your day to day shoes in a prominent position on the rack.

Back to top


Why you need a closet shoe rack

Shoes are a pleasure to buy but a pain to store. If you love to shop for shoes, shoe organizers are essential.

I was chatting with my friend, Janice from Beauty Top To Toe, the other day about:

  • how we all have too many shoes; and
  • how most of us can never find the pair we want.

We’ve both tried a fair few shoe organizers we’ve found on the high street, but the choice there is pretty limited. Anyway it got me thinking that there must be a better solution out there. So I started to check online for every shoe rack under the sun. Who’d have guessed there were 12 different types!

But why do we need one?

Unless you’re like Christina Aguilera and have an entire closet dedicated to your shoe collection (check it out HERE), you will need something a bit smaller!

If you are a shoe lover or just looking for the holy grail pair of shoes that you can wear all the time and not get sore feet, your shoe collection is constantly growing. But is it just a messy pile of shoes on your closet floor?

Investing in a shoe closet organizer will keep your shoes organized, save space, save you time hunting down the right pair or the missing shoe and keep your shoes in optimum condition. Eliminating shoe clutter will also reduce shoe stress.

Shoe racks are great as they help you to see all your shoes in one eye shot and do not need “designing” or “fitting” into your closet (which unless you have a handy hubby like me, is going to cost you time and money to install).

Back to top

Our favorite closet shoe racks

Favorite_1Favorite_2

Attractive, functional, stackable and expandable with shelves that are ideal for any type of shoe. These shoe racks are sturdy and convenient as they fold flat for easy storage. Can fit 3-5 pairs on each shelf.

==> Click HERE for more details <==

Back to top

12 Shoe organizers for closets: the pros & cons of each

Closet storage ideas for shoes can be broken down into 3 main areas: freestanding, over the door and hanging.

  • If you have plenty of floor space, opt for a freestanding version.
  • If you have plenty of hanging space, opt for a hanging version.
  • If you have neither floor space nor hanging space, opt for an over the door version.

Having trawled the online shopping malls for every decent shoe rack out there, I’ve got a nice little collection for you to browse. The following table details the number of pairs of shoes each type of organizer can hold as well as the relevant price range for our favorite picks.

Type

No. of Pairs

Price

FREESTANDING


   Expandable

6-18

$17-$23

   3 Tier/Utility

9

$28-$38

   Stackable

6-30

$17-$30

   Cubby

10-15

$29-$38

   Large/Tower

50

$80

   Revolving/Tree

18-36

$36-$68

   Shoe boxes/Drawers

6-12

$23-$30

   Rolling

12-50

$24-$80

   Wood

6-9

$23-$29

   Wire

3-12

$19-$44

OVER THE DOOR

12-36

$13-$28

HANGING

8-20

$10-$29

FREESTANDING RACKS

This is the largest group of shoe racks which come in many different styles.

Pros:

  • They offer the best view of your shoes with pairs sat side by side.
  • They are versatile in that they don’t rely on a closet door or hanging rod.
  • They are portable so can moved from room to room or even house to house.
  • There are lots of different shapes and sizes, most of which are fairly attractive.
  • It is easy to store a mixture of heels and flats.
  • They do not require any installation.
  • Shoes are easy to reach.

Cons:

  • They do take up floor space.
  • If the bottom of your closet is not well lit, telling one color from a similar one can be tricky.
  • If you have a lot of long hanging items in your closet, they may obstruct the rack.
  • You may need to move the whole rack out of the closet to clean it or underneath it.

Here are the main freestanding racks that you can find:

Expandable shoe rack

Expandable

Our recommendations hold 6-18 pairs and are priced approx. $17-23.

==> Click HERE for more details <==

Expandable shoe racks are very versatile as they can grow width wise with your shoe collection. Some are even stackable.

Pros:

  • The shoe rack will fit any closet from approx. 2′ to 4′ and any width in between.
  • They are space saving as you can make the rack fit perfectly to the number of shoes you own.
  • Rods allow for good air circulation and nowhere for dust to collect.
  • Some have a locking mechanism that stops the rack over expanding.
  • They are quite cheap per pair of shoes that can be stored.

Cons:

  • The tilt on some models is too steep and shoes that don’t have heels will slip off. Either look for racks which have non slip rods or stick a few bits of non-slip material onto them.
  • They take up floor space and cannot be placed under long hanging items.
  • Sometimes the depth between the tiers is too narrow for deep shoes.
  • If the horizontal rods are fixed to the extreme front and back of the rack, smaller shoes may not reach both and can fall through.
  • As there is not much supporting the shoes, a gentle knock can create a shoe avalanche.

Utility or 3 tier shoe rack

3 tier shoe rack

Our recommendations hold 9 pairs and are priced approx. $28-38.

==> Click HERE for more details <==

Pros:

  • 12″-13″ deep shelves make holding men’s shoes a cinch.
  • Mesh shelf options prevent heels sticking out.
  • Superior to two rod racks as shoes do not slip off.
  • Air can flow freely allowing shoes to breathe.
  • The neutral but modern look will suit most closets. They are made in a variety of materials for further décor matching.
  • Tilted options have a bar or lip to prevent shoes falling off.
  • Some models are stackable.
  • Easy to clean.

Cons:

  • They are quite expensive per pair of shoes that can be stored.
  • They take up floor space and cannot be placed under long hanging items.
  • Wire rack shelving options are not suitable for stiletto heels.

Stackable shoe rack

Stackable shoe rack

Our recommendations hold 6-30 pairs and are priced approx. $17-30.

==> Click HERE for more details <==

Pros:

  • Makes the best use of your vertical space, ideal for small closets.
  • Versatile as you can buy 1, 2 or more units depending on your closet height.
  • Mixture of rods, slats, mesh, flat and tilted shelves to suit your preference.
  • Some models can be stacked upwards as well as expanded horizontally.
  • There is good air flow so damp shoes can dry quickly, minimizing odors.

Cons:

  • Multiple flat rod options are not suitable for stiletto heels.
  • They take up floor space and cannot be placed under long hanging items.

Cubby shoe organizer

Cubby shoe organizer

Our recommendations hold 10-15 pairs and are priced approx. $29-38.

==> Click HERE for more details <==

Our preferred cubby shoe organizers are all made from different materials including poly panels, wood laminate and canvas with a chrome frame.

Pros:

  • Poly panels are easy to clean, strong and lightweight. They are just snapped together to assemble and can be configured in any number of ways to suit you.
  • Wood laminate offers a sturdy top surface for extra storage.
  • Canvas is easily removable from the chrome frame to allow for washing and is a soft material that won’t damage shoes.
  • Cubbies allow you to easily see all of your shoes at a glance so they are easy to find.
  • They are space efficient.
  • There are no cracks for stiletto heels to fall through.

Cons:

  • Shoe cubbies are quite small. Most will accommodate a pair of shoes but not side by side. They will need to be stored one on top of the other, with one back to front. Men’s shoes may require one cubby per shoe.
  • Dust and dirt can collect at the bottom of each cubby. Each slot will need to be cleaned individually.
  • Canvas cubbies could do with re-enforced shelves to better maintain the shape.
  • They take up floor space and cannot be placed under long hanging items.

Large shoe rack: 50 shoe tower

50 Pair Shoe Tower

Our recommendation holds 50 pairs and is priced approx. $80.

==> Click HERE for more details <==

If you have a large shoe collection, this rolling tower tall shoe rack is for you as it makes the most of your vertical space. It holds up to 50 pairs of shoes on a sturdy, rolling frame. It is quite pricey at around $80 but considering the number of shoes it holds, per pair it is very good value. There are 10 shelves, each of which can hold 5 pairs of shoes. It is much sturdier than other horizontal bar racks that just clip into the side frame as it is screwed together. Best of all the bars have a rough surface, stopping your shoes from slipping off.

Revolving shoe rack

Shoe tree

Our recommendations hold 18-36 pairs and are priced approx. $36-68.

==> Click HERE for more details <==

A shoe tree is a bit like a revolving cake stand. Our favorites have either 3, 4 or 7 tiers each holding 6 pairs of shoes. We love the floor to ceiling version which is secured with a tension pole and comes with a basket to hold accessories such as belts.

Pros:

  • Trees are a great vertical storage solution that take up no wall space.
  • They only take up about 1 foot square of floor space, which is much less than standard 2-3 shelf horizontal designs, leaving you loads of room for other things. They could also be used in the corner of a bedroom.
  • The heavy duty chromed steel with weighted base provides a stable, revolving rack.
  • The height of each tier can be adjusted to accommodate shoes of differing heights.
  • There is a handle at the top to help with spinning or moving about.
  • As you can spin the tree it is easy to reach every pair of shoes.
  • No dirt can fall into the shoes from the ones above.

Cons:

  • Assembly takes 5-10 minutes but no tools are required.
  • They can be heavy when fully laden due to the weight of the shoes and the base.
  • When full, you can only see the soles of your shoes which may make finding the pair you want trickier as well as not being particularly visually appealing.
  • Depending on the width of your shoes, it can get crowded and you may not be able to use all the prongs.
  • They are not as stable on carpet; for best results use on solid floors.
  • They seem quite expensive but they hold a lot of shoes so the cost per pair is actually quite low.

Shoe Boxes/Drawers

Shoe boxes

Our recommendations hold 6-12 pairs and are priced approx. $23-30.

==> Click HERE and HERE for more details <==

Pros:

  • Using the boxes that came with the shoes is cheap (ie, FREE) and environmentally friendly as you are recycling. Just attach a photo of the shoes to the front so you know what’s in the box.
  • See through boxes allow you to identify your shoes easily without having to label every one.
  • Our favorites are all stable when stacked and are made from top quality plastic or recycled materials.
  • When you no longer need the boxes for shoes (say ‘shock horror’ you donate some!), you can repurpose the boxes for toys, craft supplies etc.
  • Front opening boxes or drawers mean you do not need to unstack the top ones to get to the bottom. They offer easy access.
  • Some boxes and drawers interlock, providing an even more stable and customized structure, that you can use to make the most of your vertical space.
  • Stacked boxes look very neat and protect your shoes, keeping them in tip top condition. They can be stacked on the floor or shelves.

Cons:

  • Not all boxes are suitable for large mens shoes.
  • Some boxes are quite expensive per box/per pair of shoes.
  • Boxes that require removing from a stack to empty are best for shoes that you do not wear very often. If you try on 30 pairs every day before choosing, boxes are not going to work for you.

Rolling shoe rack

Rolling canvas shoe bin

Our recommendations hold 12-50 pairs and are priced approx. $24-80.

==> Click HERE for more details <==

Rolling shoe carts can be found as racks or closet cubes/bins. Depending on the style, they will share the pros and cons detailed above. For racks, you need to be doubly sure that the tubular shelves are non slip. Overall they roll! What more can I say. If this would be useful to you, you’ll know!

Wood shoe rack

Wooden shoe rack

Our recommendations hold 6-9 pairs and are priced approx. $23-29.

==> Click HERE for more details <==

Pros:

  • Wooden furniture can be very attractive with its simple and natural color tones. It often looks more expensive than it is.
  • Cedar has a beautiful reddish tinge and smells great in a closet.
  • Fast growing bamboo is used for some options for an eco friendly solution.
  • 13″ deep shelves can accommodate full sized men’s shoes.
  • Sturdy, stable with a strong construction.
  • Can hold purses and other accessories as well as shoes.
  • Almost solid shelves mean that shoes don’t get caught in or fall through slats.
  • Some racks have the option for shelves to be flat or angled.
  • Some racks come with a bench seat on top so you can sit down to choose or put on your shoes.

Cons:

  • Wooden shoe racks are generally not very versatile in terms of expanding or stacking abilities. (NB: an exception to this rule is the Seville Classics resin wood utility rack that can be stacked and expanded as well as folded flat!)
  • Don’t over tighten screws when assembling a wooden rack or the pieces may crack.
  • Sometimes the depth between the tiers is too narrow for deep shoes, eg high heels.
  • They take up floor space and cannot be placed under long hanging items.

Wire shoe rack

Wire shoe rack

Our recommendations hold 3-12 pairs and are priced approx. $19-44.

==> Click HERE for more details <==

Pros:

  • Wire racks are lightweight so portable but sturdy and easy to assemble.
  • They can be used to store a mixture of shoes, purses, sweaters and much more.
  • Some have a back lip on each shelf to stop things falling off or scuffing the wall.
  • They are visually accessible so you can see through racks to the shoes below.
  • The shelf rack design is better than just a rod (front and back) as shoes cannot fall through the middle gap.
  • Dust and dirt from shoes does not collect on the rack, but falls through to the bottom where it can be swept away.
  • Wire promotes great air flow so damp shoes can dry quickly, minimizing odors.

Cons:

  • They will not hold an extra heavy load.
  • They are not ideal for high heels, especially stilettos, as they fall through.
  • They take up floor space and cannot be placed under long hanging items.

OVER THE DOOR SHOE RACK

Over The Door

Our recommendations hold 12-36 pairs and are priced approx. $13-28.

==> Click HERE for more details <==

Over the door shoe organizers can instantly transform a closet door into a vertical shoe wardrobe. They come in two different designs: racks and pockets. Racks are generally metal whereas pockets are made from fabric, either nylon or linen. They have metal fasteners that hang over the top of your closet door.

Pros:

  • A great option if you’ve no room left on your closet floor or hanging rod as they make use of the dead space on the back of your closet door.
  • They are quite cheap per pair of shoes that can be stored.
  • You can easily see your shoe collection at a glance and find what you’re looking for. They also offer easy access to each pair of shoes.
  • Pockets are often plenty wide enough for women’s shoes – look for 5″+ widths for men’s shoes.
  • Pockets are also good for storing other accessories such as scarves and gloves.
  • Quick to install if they just slip over the top of the door.
  • Racks – shoes can be mixed, wide with narrow, to make the best use of space on the rack.
  • Racks – some have foldaway bars or come in separate parts for added versatility.
  • Racks – can be easily wiped clean and some come with plastic bumpers to protect the door.
  • Racks – have good air flow so damp shoes can dry quickly, minimizing odors.
  • Racks – some have the fixings to turn them into a wall mounted shoe rack as well as a back of the door organizer. These might be useful for your mudroom or garage. You would need to ensure it was fixed securely to a wall that could cope with the load.

Cons:

  • Pockets – wide shoes may not fit into the organizer at all.
  • Pocket space may be wasted on smaller shoes unless you double them up.
  • Dust and dirt may build up in the pockets, which will be a bit of a pain to clean.
  • Plastic pockets do not allow shoes to breathe as well.
  • Racks – shoes can slip off the rods unless there are non slip pads.
  • Racks – some racks are quite deep which can either interfere with the clothes being stored inside a closet or with the doors if they open inwards into a walk in closet.
  • Racks – some racks have individual hooks for each shoe. These are not as versatile as racks with rods as the space is often tight so some may be wasted unless you are only storing women’s shoes. You will also struggle to store open toed shoes on them.
  • Racks – some are not that easy to assemble.
  • Racks – are not ideal if they need screwing into your door, especially if you are renting your home.
  • Racks – cheap versions are wobbly when you open and close the door so shoes are prone to falling off.
  • The metal fasteners can scratch your closet door or frame or prevent it from closing.
  • You might be able to see the hooks from your bedroom when you close the closet door.
  • The organizer can become lop sided unless heavy shoes are balanced out. Also it is best to place your heaviest shoes at the bottom.
  • They are a bit cumbersome.

Tips when buying:

  • When looking at pocket organizers, double check whether each pocket holds one shoe or one pair of shoes, before you buy something that will only hold half of your shoe collection.
  • Choose fabric pockets over plastic ones so the air can circulate more freely and your shoes can breathe. This will prevent the buildup of mildew.
  • Look for an over door shoe rack with plenty of hooks to be secure and well balanced. Also ensure the hooks are of a good quality so that they don’t bend under the weight.
  • Check the length of the organizer will fit your door or will hang low enough if you want kids to be able to reach their own shoes.
  • Check the width of the organizer is not too big for your door.
  • Check the width of the metal fasteners is not too small for your door.
  • Ensure the material or rack frame is sturdy and has fixings (such as velcro) to ensure it doesn’t wobble or flop around when the door is opened and closed.

HANGING SHOE RACK

Hanging shoe organizer

Our recommendations hold 8-20 pairs and are priced approx. $10-29.

==> Click HERE or HERE for some cool colors <==

Pros:

  • They are quite cheap per pair of shoes that can be stored.
  • You can store 8-20 pairs of shoes in quite a narrow space on your closet rod, if you have any to spare.
  • They can be folded up when not in use.
  • Most have steel frames to ensure the shape is retained.
  • They are made from attractive canvas material which is breathable and allows shoes to air out.
  • Assembly is very minimal. Slot in the hooks and hang on the closet rod or wrap the velcro around the rod.
  • Shoes are mostly at eye level when you open the closet, making selection quick and easy. There is also no bending down to find the right pair.
  • Most have double hooks for secure hanging.
  • You can use them as a useful divider in a his and hers closet or just to divide different types of clothing.

Cons:

  • They are no good if you are short on hanging space in your closet.
  • Shoes can make the canvas dirty and being open cubbies, they can get dusty. Use shelf liners to avoid both problems. (NB: Richard’s have one hanging shoe organizer that has a zippered front to keep the dust out.)
  • Needs reinforced shelving to help the organizer say in shape when fully loaded.
  • Shoes need to be sandwiched together to fit into the cubbies. Leave the heel on display to show which pair is which.
  • Most cubbies are 5.5″ square which is OK for women’s shoes but less so for mens. (NB: Richard’s hanging shoe shelves are 8″ wide which is great. Honey Can Do also have a 12″ square option.)
  • Double check your closet rod is hung high enough to accommodate the organizer.
  • Organizers can swing back and forth when you’re putting shoes away.
  • They should be hung near the hanging rod brackets if heavy when full to give extra support.

Back to top

Shoe rack buying guide: what to look for

When looking for shoes racks for closets, remember that there is much more choice online than on the high street. But before you go mad with your credit card, think about the following points to ensure you buy the right one for your shoes and your closet.

Where do you have room to put your shoe rack? Do you have free floor space, hanging space, back of the door space or shelf space? This will determine which of the 12 styles detailed above will be most appropriate.

Count the number of shoes you own – you’ve probably got more than you think. Check under your bed, under the kitchen table, in your gym bag, under your desk at work or any other place you might find another pair stashed away. Declutter them first by throwing away any you no longer wear so that you don’t overspend on buying a rack.

Double check the measurements of the rack you are interested in to confirm the number of pairs the manufacturer’s description says it can hold. Divide the number of inches wide by 10 to confirm the number of mens shoes that will fit. Note you will be able to fit more womens shoes in the same width though.

Choose a rack that will accommodate a few extra pairs of shoes so there is room for growth.

Check the height of the free space available at the bottom of your closet, underneath the hanging clothes. Will a rack fit?

What is your budget?

Will the style you are interested in hold the various shoe types that you plan on storing on it? Is the height between shelves large enough to hold your high heels? Remember mens and womens shoes differ in both size and weight.

What material would you prefer your rack to be made from:

  • plastic – is not very attractive but is easy to keep clean, budget friendly and lightweight.
  • wood – is pleasant on the eye, is available in antique styles but might require some maintenance.
  • metal – is often the most expensive and heavy but is durable and stylish.
  • wire – is modern looking, lightweight and available in floor and over the door models.

Do you like the style and look of the rack? You are going to see it every day so make sure you like it. Does it match with the overall theme of your bedroom or other closet organizers that you own.

Choose an adjustable rack to make the best use of your space. Or at least one that is expandable.

How heavy is it? Bear this in mind if you want to be able to move it around to clean under it for example.

How easy will the rack be to clean?

Choose a rack that requires little to no assembly or installation for the quickest and easiest way to an organized closet.

For tilted shoe storage racks, make sure there is either a front lip holding the shoes in place or some sort of non-slip material covering the frame.

Most racks are 9-12″ deep. If you will be storing men’s shoes on the rack, go for the larger size.

Consider extra features such as racks with tilting as optional, or those that allow you to store your shoes back to front.

Back to top

How to organize shoes

Buying a shoe rack is not miraculously going to result in organized shoes in your closet. Unfortunately you’re going to have to do a bit of work!

So start by finding all of your shoes wherever they may be.

Next declutter: be ruthless. Do you ever wear half the shoes taking up all that room on your closet floor? Toss those that are worn through or otherwise irreparable. Donate those that are so out of fashion you wouldn’t be seen dead in them or those that you just never wear. It’s crazy I know but there is no point in hoarding shoes you don’t wear! Now you’re left with a ‘Keep’ pile.

Donate gently worn shoes to provide shoes to those in need.

Check out Soles4Souls.org

Now group your shoes into an order that makes sense to you. This may be like with like, such as flats, dressy shoes, gym shoes etc. It may be by color. It may be by heel height.

Select your ‘Go To’ shoes or those you wear most often and put them on your shoe rack in the most accessible location, usually front and center of the top rack shelf.

Now assign a home on your shoe rack to all your other shoes, with those worn least often being the least accessible or furthest out of eye shot.

If you can’t fit all your shoes on the rack, store those that you hardly ever wear up on the highest shelves in your closet or elsewhere perhaps under your bed. One idea for a small closet it to only keep ‘in season’ shoes in there. Swap them over when the season changes.

Try out your new shoe system for the next two weeks. How does it work? Do you know where all of your shoes are? Is the system too much hassle or too complicated to use? If so, make any necessary amendments.

Practice a strict “1 in, 1 out” policy for any new shoe purchases!

Want to know how to organize your boots? Now that’s a whole other story. One I’ll get round to soon. In the meantime, check this out for some helpful information from About.com.

Back to top

Shoe storage FAQs

Shoe storage is a key closet organization problem. I have received a number of questions lately from readers all related to how to organize shoes. Here they are with my recommendations:

Where can I store flip flops?

Check out this flip flop hanger by Beehive Central which can hold up to 7 pairs of flip flops, sandals or slippers. It can even hold jewelry, belts, scarves etc. It can hang on your closet rod, doorknob or wall hook.

Flip Flop Hanger

==> Click HERE for more details <==

Or how about this DIY version made from wire hangers? Click for the ‘how to’ from TheWeekendHomeMaker.com.

DIY Flip flop hanger

Or how about just using a regular box or bin? Image credit: KennyAnderin.Blogspot.com.

Flip flop box

How can I distinguish black and navy shoes in the dark?

This question is from a reader who went to work with one navy shoe and one black one which I imagine was a rather embarrassing problem!

Your closet needs light. For a quick and easy fix involving no wires or complex installation, try this pack of 3 super bright LED battery lights. The lights are stuck on your closet walls and then pointed to the exact location of your shoes.

Closet lights

How can I find shoes in shoe boxes without opening every box?

Unless you invest in clear shoe boxes, the best way to know which shoes are in which cardboard boxes is to stick a picture to the front (image credit). You can either take your own photos, print out an image from the internet or cut one out of a magazine. Alternatively you could get your label maker out and create a label describing the shoes or just use a marker pen.

Shoe Boxes with photos

I have too many shoes to fit on my one shoe rack that is already taking up the whole width of my closet.

There are a few answers to this question:

  • Declutter your shoes. With fewer to organize, you will need less organizers.
  • Swap your shoe rack for another stackable version so you can add more rows and hence more shoe storage space. Use your existing shoe rack in another closet.
  • Invest in other types of shoe organizer. Try a hanging organizer if you have any hanging space left or an over the door organizer if not.
  • Your final option is to store out of season or shoes that are not worn very often elsewhere, such as in boxes on a high shelf, a spare room, or your garage.

Back to top

DIY shoe rack options for those on a budget

If your last dime went on a pair of shoes rather than a shoe rack, you will need to find creative ways to organize and store your shoes. These interesting ideas from around the web may be useful to you if you have a small closet or want something a bit more customized.

Picture rail shoe rack – Use existing or install new picture rails or architectural plaster moldings to use as shelves for your high heels. These shoes will be on display all the time, so this idea is only really suitable for good looking shoes. The only downsides are that your shoes will get dusty and you will get to see the insoles. Hang the rail above a mirror for a classy look. Image credit: mmadden at Flickr.

Hang heels from shelves

Wooden pallet shoe rack from Re-Nest.com. No assembly required. Might not be ideal for keeping your shoes scuff free though.

Pallet shoe rack

Drain pipe shoe rack – a novel idea from ApartmentTherapy.com.

Drain pipe shoe rack

Magazine rack shoe organizer – pretty cool from DesireToInspire.net.

Magazine rack shoe rack

Shelf grabber – check out the ‘how to’ guide over at NotMartha.org.

Shoe grabber rack 1 Shoe grabber rack 2

3 tier pine shoe rack – find the complete project instructions at Au.Lifestyle.Yahoo.com.

DIY wooden shoe rack

A super simple and attractive shoe organizer for under $20 – build your own with FamilyHandyMan.com.

DIY wooden shoe shelf

Use a bookshelf – even a small closet might have room for a small bookshelf. Use the top for accessories and the shelves for your shoes. This top idea is from Deliciously Organized.

Bookshelf shoe rack

A reclaimed shoe rack – full ‘how to’ instructions can be found at DIYIdeas.com.

Rustic DIY shoe rack

Shoe rack plans – can be found at WoodWorkingCorner.com.

Wooden shoe cabinet

Coat hook shoes racks – buy some cheap 2″ coat hooks and mount them on your closet wall. Hang up your shoes – job done.

Back to top

Funky shoe racks gallery

The Nest Shoe Rack can be found at Amazon.com.

Funky shoe rack

The Miami Stiletto Shoeshelf from MashallahDesign.Lacaptas.com.

Stiletto shoe shelf

The Shoe Wheel from RakkuDesigns.com.

Shoe wheel

The Hotel Box from PureNoMade.co.uk.

Fancy shoe box

The Footprint from CharlotteTangye.co.uk.

Footprint shoe rack

Hold My Trainer from Bouf.com.

Hold my shoes rack

An industrial design by Demetrius Tanase as seen on Behance.net.

Unusual Shoe Rack

The Perigot 6 Pair Shoe Rack from Furnish.co.uk.

Unusual Shoe Rack 2

The Skorder Shoe Rack from JohannaEliason.com.

Unusual Shoe Rack 3

Back to top

I’d love to hear about your shoe storage successes and problems. Please leave me a comment.

I’m linking up to these blog parties:
Organize With Sandy
I’m An Organizing Junkie

Rubbermaid Closet Organizers: Everything You Need To Know

Have you heard great things about Rubbermaid closet organizers? Are you trying to find out if they’re right for you, your clothes and your closet? If so, I can help.

Rubbermaid closet systems are a simple and affordable solution to your ‘how to organize a closet‘ worries. An organized closet will save you time by taking the guesswork out of what to wear each morning, giving you a stress free start to your day.

Break away from the single rod and shelf in your current closet and opt instead for a customized solution. Design and install a system that is personalized to YOUR closet size and shape and YOUR clothes.

Double or triple your useable storage space for between $50 and $150.

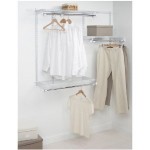
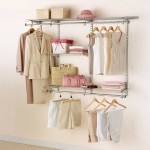
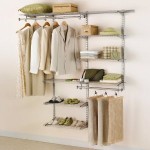
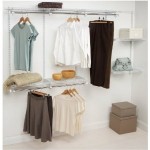
Rubbermaid Closet Organizers Configuration 2 Configuration 3 Configuration 4

Due to their immense popularity (just look at the hundreds of 5 star reviews on Amazon.com), I’ve been researching the Rubbermaid Configurations kits for a while. Here are my findings:


In a rush? Quick overview

There are 5 Rubbermaid closet storage organizers to choose between ranging from $50-$150 and fitting any closet sizes from 3′ to 8′. They will maximize the storage space available in your closet keeping choosing your clothes stress free and saving you time.

They are made up of a collection of wire shelving, hanging rods and all the hardware needed for a DIY installation. They are ultimately flexible with regards to how you layout all the components and allow you to change your configuration at any time without redrilling anything. There are also many add on accessories that you can use to personalize your design as and when required.

Installation is easy for a DIY novice and the 4 step process will take around 1-3 hours. Deciding where to place each component is the fun part and Rubbermaid offer plenty of ideas on the box or on their website to get your creative juices flowing.

Homeowners who have them, love them and often buy more for other closets in their home. There are a few considerations to be taken into account before purchase, all of which are answered below with some thoughts on how best to design your organizer before you start.

Avoid the closet black hole and try out a Rubbermaid closet organizer now without spending much time or money.

Read on to discover our detailed review, FAQs, installation guide and after sales support tips.


What are the differences between each kit?

There are currently 5 Rubbermaid Configurations closet system kits to chose from.


Starter 3-6 Classic 3-6 Deluxe 4-8 Classic 4-8 Deluxe

Type:

Starter

Classic

Deluxe

Classic

Deluxe

Size:

3′-6′

3′-6′

3′-6′

4′-8′

4′-8′

Shelves:

3 (8′)

5 (12′)

8 (18′)

5 (14′)

9 (22′)

Rods:

2 (5′)

2 (5′)

2 (5′)

2 (6′)

2 (6′)

Uprights:

4

4

4

5

5

Extensions:

0

0

2

0

2

==> Click HERE for current prices ranging from $50 to $150 <==

Basically there are two sizes of kits – the 3′-6′ option and the 4′-8′ option. So measure your closet and decide which one will fit. If you have a 5′ closet say, so both kits would work, check out the specifications above with regards to the number of shelves etc, to see which one really is best for you.

To finalize your decision, you need to choose between the classic and deluxe options – the classic being the basic option, the deluxe having more shelves and 2 upright extensions allowing you to place shelves lower down toward the floor.

Tip: Sometimes you can get better value for money by buying two Classic kits rather than a Deluxe.

The kits are available in two color choices – white and titanium, which gives the kit a more polished and expensive look.

Back to top

How does the Rubbermaid closet system work?

Configurations by Rubbermaid kits are designed to maximize the space in your closet by giving you hanging space (long, short, both or double short hanging) as well as plenty of shelf space. There are also accessories, such as pants hangers or tie racks, that can be added onto any kit.

They are a complete, all in one, DIY kit aimed at beginners to do it yourself home improvement tasks. If you know one end of basic tools, such as a drill and level, from the other, then there is no need to call in a professional. You will find the whole process fun, satisfying and more importantly in this day and age, cheap.

They are made up of a horizontal rail that is secured into wall studs to provide strength and upright tracks that are hung anywhere on the rail making them versatile as they can be moved around at any time.

Look away now for the boring bit! The upright tracks are double track standards. Each shelf bracket has two sets of hooks that fit into the rows of slots in each standard. As with any standard and bracket system, the brackets are as easy to remove from the slots as they are to put in, so brackets (and therefore shelves) can be reconfigured easily.

The 3 key benefits of the system are:

  • it is easy to install;
  • it is fully customizable;
  • it is versatile, so can be reconfigured at any time.

Check out the installation instructions below to see how easy the process is.

Now imagine customizing your own closet:

Empty your closet and install the Rubbermaid closet organization system in one of the MANY possible configurations. Choose one that suits YOUR clothes and remember you can move any or all of the components around at any time. Make the best of your closet space by using hanging rods and shelves in multiple places.

Rubbermaid_Closet_BeforeRubbermaid_Closet_Middle

Imagine the final result but remember it would be easy to reconfigure the hanging rods and shelves by simply unlocking them from their current location and repositioning them somewhere else, such as:

Rubbermaid_Closet_FinalRubbermaid_Closet_Config_1Rubbermaid_Closet_Config_2

And why not throw in some accessories while you’re at it!

Rubbermaid_Closet_Accessory_Kits

Tip: declutter your clothes before returning them to your beautiful new closet, although this will no doubt be harder than the installation! Oh dear.

Back to top

Pros and cons of Rubbermaid closet organizers

I have crowd sourced the pros and cons of this system by trawling through over 400 reviews on Amazon and Rubbermaid’s own website and it took hours! So save yourself the trouble and check out my findings below:

THE PROS

Increase the storage capacity of closets in any room in your home

As well as your bedroom, these kits can help organize clutter in your home office, the laundry room, and many more locations. Suitable for walk in and reach in closets as well as open walls, the possibilities are endless and I bet you’ll go back for more after your first kit.

Rubbermaid_Closet_Organizers_For_All_Rooms

Customize and expand a basic rod and shelf layout at any time

The extras available to accessorize the basic kits, really add to the customizing possibilities. Baskets are extremely helpful to corral underwear and don’t miss the specific organizers designed for pants, ties, belts and shoes. Mix and match the huge selection of add ons on offer and own that closet – personalize it in any way you choose.

The best part is that you don’t need to buy these extras initially. Add them into your system when you’re sure you need them or your requirements change and you need that little bit of extra storage space. After your next shopping spree, buy a new basket or shelf to cope with the influx!

Your closet system is also ultimately expandable. If you have a large or L shaped closet, just buy two or more kits to make the most of your space.

If you work your way slowly through all the closets in your home, you can mix and match components between rooms to get the perfect systems in each one.

Quality but so much cheaper than other closet systems

You no longer need to look at your messy closet in despair thinking you’ll have to spend tons of money getting a custom design, the Rubbermaid kits are exceptionally good value for money typically costing between $50 and $150. As with all Rubbermaid products, they are top quality, sturdy, durable and come with a lifetime guarantee. The overall look is minimalistic but sleek and visually appealing. The polished chrome rods don’t sag and the system stays tight to the wall.

Easy to move about

Whether you are renting or likely to move house soon, or just want to move your child’s closet into a larger room, these kits are as easy to take down and reinstall in another room as they are to put up. There are not many screw holes to patch up so your closet is not locked into the one place when your circumstances change.

No need to plan for the perfect design

When trying to decide on how to design your closet, you may be stuck in ‘analysis paralysis’. How much hanging space do you need? How many shelves will work best? Long hanging or short hanging?

If you can’t decide what layout will work best for you, don’t worry. Buy the kit that will fit your closet and then experiment. Try one configuration for a week, a day or even an hour. Don’t like it? Change it. If your needs change in the future, change it.

Remove shelves to make more hanging space, add shelves for more storage. Just move shelves about. You’re the boss.

Tip: if you only store in season clothes in your closet, increase the height between shelves in the winter to store your bulky sweaters.

It’s simple – no more drilling or screwing once the initial installation is done. You just unsnap or unlock the fixings and move them about.

These kits are especially great for kids rooms as you can have hanging rods and some shelves down low for them to reach along with higher shelves out of the way. As they grow, you can move the rods and shelves up a few inches at a time.

Create more space in your bedroom

By maximizing the space in your closet, you will save space in your bedroom. This may allow you to eliminate dressers or other storage items, freeing up the bedroom to look much larger.

Clothing & user friendly

The epoxy coating on the Rubbermaid closet shelving is maintenance free. It won’t peel or chip or rust, so your clothes won’t get snagged or marked. It is durable and has a clean shiny look. There are also no jagged edges lingering about as the installation requires no cutting of shelves or any other component.

Tip: Install the shelves with their lip up to stop clothes sliding off when you remove one item.

Hang_rodsThe easy glide hanging rod system is also heaven sent. Hangers slide easily from one end of the rod to the other – all 8′ of it if need be. The rod hangers are designed so as not to impede the track, so there is no need to remove the clothes hanger to get it from one section of the closet to the other.

Unusually shaped closets welcome

Whatever the size and shape of your closet space, this Rubbermaid storage closet organizer will fit. No need to worry about expensive ‘custom’ work from professional installers or ‘standard’ closet organizers not fitting in without a lot of alterations, this system will fit any closet wall between 3′ and 8′ and every width in between.

DIY dummies welcome

If you know a hammer from a drill and have a bit of common sense, the easy to follow instructions will guide even the most DIY challenged amongst us to success. Most people own or can borrow the basic tools required and there is no cutting or jiggery pokery involved. The hang rails and shelves overlap and the rods are telescoping to become any size you desire. It is even possible to install on your own, although two pairs of hands would come in handy.

I hate to say this but many reviewers were women commenting that ‘even they’ managed it without any help from their husbands. Now personally I’d let my hubby get on with the drilling and screwing bit while I mulled over my layout. I’d then take over for the fun bit of putting the shelves and rods in the right places.

Speed is of the essence

There is no need to wait for weeks to get the closet of your dreams. Spend 5 minutes measuring your closet, 5 minutes ordering your kit online, OK wait a day or so for your delivery, but then a couple of hours later, it’s done. You have a new closet.

Everything you need for a complete installation is in the box. The rails, the tracks, the brackets, shelves and rods – it’s all there with the mounting hardware (screws, wall anchors etc) so there’s no need for multiple trips to the DIY store.

Most reviewers took between 1 and 3 hours to install the system. You might need extra time to remove and patch up any closet organizers you currently have installed or to paint the walls to really pimp it, but you get the basic idea – it’s a quick solution!

A place for everything and everything in its place

Rubbermaid’s closet system helps ensure you follow the above organizing mantra. Not only will your clothes have a home, where you can actually see and therefore find them, but you will have space for your shoes, purses, hats, belts and everything else that is in your closet. You really will be in closet heaven.

Add some decorative touches

The range of accessories you could incorporate into your closet organization ideas includes both wood and canvas elements to further personalize the look of your closet. For more accessories click here.

Accessories 1Accessories 2

Sneaky tricks

When checking out accessories for your Configurations Rubbermaid system, you do not need to limit yourself to Rubbermaid products. Surprisingly the upright tracks for Rubbermaid, ClosetMaid and Elfa all have the same slot design, so you can interchange most accessories. You cannot interchange the upright tracks themselves as how they hang on the wall is different and you will want to consider the look of accessories made by other brands to ensure the overall theme will be maintained.

THE CONS

A review is not a review without pointing out all the bad bits as well as the good, so brace yourself. Here they are:

You may spend hours reconfiguring your closet

Being ultimately versatile is good in one way but not in another. Knowing the perfect configuration is out there somewhere may drive you (and your other half) mad. Spend some time on closet design up front to save yourself hours later on.

I don’t know anything about wall studs or drywall anchors

These two technical terms often make prospective installers a bit nervous as they are key to a securely mounted system. Don’t worry though as our ‘After sales support‘ section explains them in more detail and should put your mind at rest.

If you are not installing onto drywall (or you cannot find your wall studs) and you are not a seasoned DIYer, then you’re going to need a bit more help with working out which wall anchors to use instead.

The drywall anchors included with the kit are plastic. Now this is not necessarily a bad thing and they obviously do work. It’s just they are the weakest of all anchors, so many reviewers have purchased metal anchors or toggles which will support heavier loads. The included ones are also too shallow for 3/4″ drywall found in older houses.

Is this system for giants?

The recommended height for the hang rail is 86.5″ from the ground. Now bear in mind this is where your top shelf is going to be as well as a hanging rod. Will you be able to reach it without a step stool? Is your ceiling quite low meaning the top shelf will be useless? Do you want your lowest shelf lower than 39″ off the ground?

If so, reduce this height, say by 5″. If you prefer to leave it as it is, check out this great fold away step stool for under $15.

Be organized to save money

The cost of buying extra pieces, such as extra Rubbermaid wire shelving, to add onto your initial kit can mount up, so it is often more cost effective to buy a bigger kit than you need in the first place. If you are planning on installing this system in a few closets any leftover pieces will come in handy. Many reviewers, however, mentioned having too many pieces especially when buying the deluxe kit and then adding on accessories. So planning a great design at the outset, that has room for future expansion, is probably the best bet and will save money in the long run.

Not enough upright track

The Classic kits come with 4 or 5 upright tracks (depending on size) which is generally enough for most configurations. The problem comes if you want your design to extend further down the wall. Currently with the 47.5″ tracks, your system will only cover just over half of your wall. Now this is fine if you want to make use of double hanging space or you have shoe boxes stacked on the floor, but if you want a whole column of shelves, you need upright extenders. Two are included in the Deluxe kits or you can buy them separately, but either way you need to know this in advance to ensure you have all the pieces you need for installation.

Aaaagh there are some pieces missing

Most of the time, the kits come complete but there are occasions when pieces are missing or damaged. Before you start installing the kit, check the box against the parts list. Do not make the mistake of thinking you can call up Rubbermaid and ask them to send a replacement for the missing or damaged piece as they don’t hold such stock. They will ask you to return the WHOLE kit to the retailer for a replacement. This will cause double the frustration if you have to take down what you’ve just put up.

Aaaagh it weighs a ton

The largest kit weighs nearly 51 pounds when complete in the box. Bear this in mind if you plan on buying it at a local store or having it delivered to work. All the pieces are lightweight when dealt with individually but trying to carry that box about is not for the weedy amongst us.

Minor annoyances

The trim pieces that cover the last few inches of the hang rail can be prone to falling off.

The plastic shelf locks can break.

To ensure a good fit when overlapping shelves, one shelf is slightly deeper than the other. A few reviewers found this to look a little odd.

==> Click HERE for current prices ranging from $50 to $150 <==

Back to top

Installation

Installing Rubbermaid closet storage systems is as easy as 1 .. 2 .. 3, well actually it’s 1 ..2 .. 3 .. 4, but who’s counting!

The tools you will need are: a level, a screwdriver, a pencil, a tape measure, a hammer, a drill with 1/8″ and 3/8″ bits.

Tip: Paint your closet first, then it will look much nicer and bigger once complete.

First of all you mount the horizontal hang rails. This is the most difficult bit as you need to find your wall studs to screw the rail into as well as ensure you hang it level. You don’t need to cut anything though as the two pieces of rail overlap to expand or shorten to the perfect fit. Just make sure you triple check your measurements and levels before starting!

Rubbermaid_Closet_Step_1Overlapping_hang_rail

Next you install the upright tracks. These just hang from the horizontal hang rail at the top but are screwed in once at the bottom. You start by positioning both left and right end uprights and then fill in the ones in the middle depending on the space you have and the design you want.

Rubbermaid_Closet_Step_2Hang_uprights

Tip: give your design some thought now to save time later.

The hang rail covers are used to measure the correct distance between upright tracks before being clipped into place. They will need to be 22″ apart if you will be using accessories such as drawers and sliding baskets.

Track_Upright_SystemIf you have bought one of the Deluxe kits, you will have upright extensions to install as well. These should be placed where you will want to install accessories or have shelving closer to the floor. There is a connector to join them to the main upright tracks as well as top and bottom screws to secure them to the wall.

Step 3 is to slot the brackets into the upright tracks where desired and position the shelves.

Rubbermaid_Closet_Step_3Insert_brackets

If two shelves side by side are too long, you just need to overlap them to fit – no cutting is required. You then secure the shelves into place by sliding the plastic locking clip towards the wall until it snaps locked.

Telescoping_PartsLock_Shelves

Finally fit your rod hangers to the bottom of the shelf brackets as required until they lock into place. Then place the telescoping rods into the hangers and press down to snap into place.

Rubbermaid_Closet_Step_4Install_Rod_Hangers

As you can see from the installation instructions, the rod hangers and rods as well as the shelves and brackets all slot or snap into place. This means they are easily removed and relocated to other locations within the closet system allowing for a completely customizable and reconfigurable organizer.

Back to top
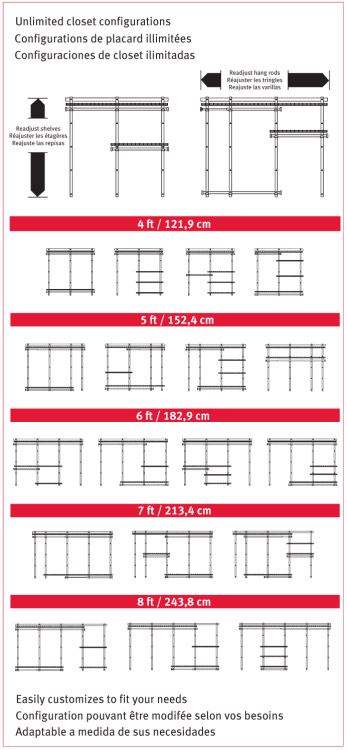
Rubbermaid Configurations IdeasDesigning your layout

How to arrange the components of this organizing system is probably the hardest but most fun part of the installation. There are so many configurations you really are spoilt for choice. This is great in one way but also means you won’t really know which is best until you try it.

For some inspiration check out:

Back to top

Accessories

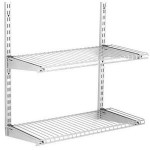
The range of accessories is quite vast – including extra hardware, specific organizers, canvas and wood items.

==> Click on each IMAGE for details of the full range <==
Shelving Kit Basket Accessories 2 Accessories 1

Back to top

Frequently asked questions

What comes in the box?

The closet kits are complete with everything you need for a quick and easy installation: the hang rails, the vertical tracks, brackets, shelves, hanging rods and all necessary hardware. There is no need to dash back and forth to the shop to buy individual components.

What do I need to be able to install the closet organizer?

Installation is designed to be easy although a very basic knowledge of DIY projects would help. The tools that you will require are a level, screwdriver and drill.

How are the shelves and rods installed perfectly without any need for cutting?

The rods are telescoping so can be adjusted to fit perfectly. The shelves overlap each other meaning you can overlap anything from 0″ to the whole width of a shelf to avoid having to cut them.

Do I have to follow the instructions with regards to the height of the hang rail?

No, this is your closet and the instructions just offer a guideline height that will be suitable for most people and closets. If you are shorter than average, you may want to bring the hang rail down 5″, so you can reach the hanging rods and upper shelf a bit easier.

How far apart should the vertical uprights be located?

Rubbermaid recommend that you leave 22″ of space between your uprights (inside to inside). If you want to add any accessories, this is an important consideration.

Can I buy add on brackets, shelves and hanging rods?

You cannot buy individual pieces such as hanging rods online, but you can buy add on shelving kits as part of the range of accessories. These come with four brackets and two shelves. You may be able to find more individual pieces in your local Lowes store (NB: Configurations is called HomeFree in store.)

Can I buy 90 degree corner shelves?

Unfortunately not.

Do I have to have a shelf above the hanging rod?

Yes as the rod hangers fit to the bottom of the shelf brackets.

How should I design the layout of my closet?

Rubbermaid.com as well as on the back of the box contain ideas for how you could layout the components. You could also check out our How To Organize A Closet post which has a section on how to design your closet for some useful tips. But perhaps the key thing to remember is that however you initially layout the rods and shelves, you can quickly and easily change them around if they don’t work as well as you’d like.

How easy is it to reconfigure the system once installed?

Once the hang rail and vertical tracks are installed it is very easy to move the shelves, hanging rods and accessories. They can all be moved left, right, up and down quickly and easily. Simply unlock the shelves, then unclip the brackets, move to the new location, reclip the brackets, relay the shelves and lock into place.

Can the system be expanded?

The system can be expanded by buying more vertical tracks (called Upright Extensions). These extensions can be used to extend an existing track or create a whole new one. Individual shelves can then be purchased to fix onto the track, as well as accessories such as pants organizers, baskets etc.

What are the shelf dimensions?

The basic shelf dimensions are 12″ deep, by 26″ or 48″ wide. However as the shelves overlap, you can take two shelves and create any width from 26″ to 96″, perfectly fitting your space with no cutting.

What are the hanging rod dimensions?

Due to their telescoping nature, the hanging rods can fit widths between 2′ and 8′.

What would I use the basket accessories for?

Clothing items such as underwear or accessories such as purses do not sit well on shelves so baskets are ideal to keep things together and neatly organized.

How many items can I fit on each accessory?

  • The shoe rods can hold between 6 and 8 pairs of shoes. The shelves however, only hold 3-4 pairs.
  • The pants organizer can hold 7 pairs of pants.
  • The tie and belt rack can hold 30 items.

How should I clean the closet organizer?

The system is designed to be maintenance free but you can wipe it down with a damp cloth to keep it clean.

What is the difference between the Rubbermaid Homefree series and Rubbermaid Configurations closet system?

Nothing. Homefree is exactly the same system but it is only available in white in Lowes stores. Only the Classic kits are available; there are no Deluxe versions. You can, however, buy individual components as well as kits.

Back to top

After sales support

Full installation instructions can be found here.

I don’t know anything about wall studs

The system is designed for drywall installation with the main hang rail being fixed into wall studs. These are the vertical pieces of wood that make up the frame that holds your drywall (or plasterboard), creating your wall. Being made of wood they are a lot more secure to screw into that a thin piece of drywall and as such must be located unless you want your organizer to collapse.

They are typically placed 16″ apart but can also be found spanning 12″ or 24″. The best way to find them is using a stud finder (check out this popular one that costs about $10), although you can also try tapping lightly on the wall to find the least vibration, or drill a few holes in the drywall and find the studs by trial and error.

If your house is old or you cannot find your wall studs, you will need to secure the rail to the wall with different anchor attachments specific to your wall.

I don’t know anything about drywall anchors

The hang rail needs to be secured to the wall within 4″ from either end and at least every 24″ in the middle. For places where you do not have wall studs to screw into, you will need to use drywall anchors as fixings. These are pushed into a hole that you have drilled in the drywall until they are flush. Their strength comes from the spreading mechanism that goes on behind the drywall that stops them being pulled back through the initial hole. Screws can then be used through the anchor to hold the rail in place.

Tips:

Make sure you know what is inside or on the other side of your wall before you start your installation. You don’t want to be drilling or screwing into electric cables, plumbing pipes, mirrors etc.

To ensure you will be happy with the height of the whole system, stick a line of masking tape across the wall where you are planning to install the hang rail. This will give you a feel for whether you can reach the shelf and top hanging rod etc.

If the holes in the hang rail don’t line up properly with the wall studs, you could try drilling your own holes in the metal if you have the right drill bit or try using sturdy wall anchors, such as Hilti toggler bolts for drywall.

Don’t over tighten the screws when installing the upright tracks. A snug fit will do just fine, without breaking the drywall.

==> Click HERE for current prices ranging from $50 to $150 <==

Back to top

How To Organize A Closet: The Ultimate Guide

Is your closet a disaster? Does it stress you out? Do you have a clothes mountain waiting to fall on top of you every time you open the closet door? Is your closet so overrun that your clothes are now taking over your bedroom?

If so you need some tips on how to organize a closet. Inside this guide you will find:

In a rush? A quick overview

You can save time, money and stress by having an organized closet and here’s how:

Start by decluttering. If you don’t love it, wear it or look good in it, then get rid of it. Be ruthless, be brutal and donate these items. Someone else will appreciate your efforts. Now you have less stuff to organize so giving everything a proper home will be easier.

Take everything out of your closet and group items in a way that works for you (eg, color, style, type, function). Replace things in a place appropriate to their style (eg, skirts on hangers, sweaters on shelves, camisoles in baskets). Keep items used most often at the front and middle with rarely used items at the back, sides and upper shelves.

Utilize every square inch of your closet from top to bottom, including every wall, the floor and the back of the door. Use closet organizers to maximize the space. Make your closet as attractive as possible to inspire you to keep it organized but schedule in a monthly review to keep on top of things.


Why bother organizing your closet?

By learning how to organize your closet you will:

  • be able to find clothes, shoes and accessories quickly and easily (no more chaos at 6am when you’re rushing to get ready for work) and perhaps more importantly, put them back in the right place;
  • know exactly what you have in your clothes inventory (meaning (a) that you don’t need to waste money buying another white long sleeved blouse or whatever else has just taken your fancy and (b) that you can look as good as new in that little black dress you had forgotten you bought);
  • be able to reclaim and properly utilize that premium closet space that was previously being wasted.

Your closet is probably one of the first things you see every morning and an organized closet will give your start to the day the uplift it needs.

If you want to achieve all of these things, but just can’t get motivated, read all about overcoming your roadblocks here.

Back to top

How to declutter your closet

Any organizing task, starts with a good bout of decluttering.

In order to maintain an organized closet, every item of clothing, shoes and accessories needs their own home within the space. Without a place to call home, items will turn into clutter whether that is in the closet itself or in your bedroom.

But even with a home, your closet will still attract clutter in the form of items that shouldn’t really be in there. You might have a hanging rod for blouses, but there are a few on there that you just never wear and probably never will. These are cluttering up the rod, the closet and your life.

If your rods, shelves, drawers and floor space are crammed full of wrinkled items, start decluttering today. Remember if you can’t see it, you won’t wear it, so get rid of some stuff and make space for the items you don’t want to forget about.

Grab yourself a large, sturdy shopping bag and use it as a ‘Donation Station‘.

Start at the top of your closet and work down asking yourself the following questions about each item:

  • do I love it?
  • do I wear it?
  • do I feel good in it?

If you can’t answer ‘yes’ to one of these questions, put it in your donate bag.

An alternate question to ask is: “Have I worn this item in the last year?“. If not, the chances are you never will, so be brutal and fill up that donate bag. Remember just because you’ve spent money on something, doesn’t mean it should take up valuable space in your closet, and if you’re thinking “I’ll wear it someday”, get real, someday never comes. So learn to let go.

If you find yourself stressing at the thought of donating all these items, take the less ruthless option. Hang all your items with the hangers facing the wrong way round. Every time you return the item to the closet after having worn it, put the hanger in the right way round. This way you will know for sure in 6 months to a year what you haven’t worn. Promise yourself now, that you will donate your surplus.

Remember, all the clothes you never wear could make a big difference to someone else’s life. Sometimes looking at the good you could do for someone else helps you move your clothing from the hanging rod to the Donation Station.

A key to the Donation Station idea is knowing where to donate your clothes. Unless your items are vintage or designer and in excellent condition, it is unlikely that you will get much money for them second hand, so find your local Goodwill, Salvation Army or Vietnam Veterans of America drop off point and stop by the next time you are in the area.

Tip: Don’t forget to get a receipt to claim back some tax on your donations.

Once emptied keep your Donation Station bag handy in your closet for a monthly sweep.

Back to top

How to organize your closet – a step by step guide

There seem to be two trains of thought when it comes to exactly how to start organizing your closet. I call these the OMG approach and the softly, softly approach. Personally I prefer the latter but both have times when they would be useful.

The OMG approach: Take everything out, pile it on the bed or floor, organize and replace.

The softly, softly approach: Clear one area at a time, organize and replace.

Basically you need to decide how much chaos you can stand at one time. Personally the OMG approach would make me feel overwhelmed and frustrated.

You will need to take the OMG approach though, if you are installing a closet organization system, such as wire rods and shelving from Rubbermaid or if you know that the only way to get your closet sorted once and for all is to empty it all out so you have to organize it to go to bed that night! For this approach I recommend you set aside at least a few hours.

The softly, softly approach is more suitable if you already have adequate shelving and rods but your clothes have run amock inside. It is also best if you only have 10 minutes here and there to regain control.

Luckily whichever route you choose, the principles are the same. Just apply them to your entire clothing inventory or to the subsection you have chosen to tackle:

Step 1
Declutter (details above)

Step 2
Group items in a way that makes the most sense to you. Ideas include:

  • like items together (eg, jeans, sweaters, camisoles);
  • by color;
  • by season;
  • by sleeve length;
  • by hem length;
  • by function (eg, work, gym, bedwear);
  • a Go To section for your favorite items that you wear all the time;
  • shoes by style (heels, flats, sandals, boots).

Step 3
Think about the most appropriate place to store each item type:

  • hang pants, skirts, blouses, dresses;
  • stack sweaters on shelves;
  • put folded items such as t-shirts and jeans on shelves or in drawers (although shelves allow for easier access);
  • put underwear in a basket;
  • put belts in a basket;
  • use boxes for odds and ends.

Step 4
Replace items into the closet. Ideally use a system that you can maintain daily without any extra effort. Remember to:

  • place the items used most often in the front and middle sections (off season and rarely used items should be relegated to the sides, back and upper shelves)
  • utilize all of the available space, every square inch of it: up high, down low, every wall and even the back of the door.

Step 5
Consider making or investing in some closet organizers to help you with this as your old closet design didn’t work, so maybe it’s time for a new one. Reconfigure your current rods and shelves by moving them into new places and/or add new ones if possible.

Tip: keep all of your clothing receipts in an envelope pinned to your closet wall. This way you’ll know exactly where they are should you need to exchange or return anything.

Maintenance

Once a month, perform a quick scan around your closet. Is everything in the right place? Is there any available space not being used? Are there any items that should be donated? Also why not archive some of your favorites so you are forced to wear some other things for a change?

Twice a year, think about tackling a full reorganization to catch anything that is lurking at the back!

Here’s a great video about closet organization to help keep you in style.

Back to top

10 minute makeovers

If you are short on time or just prefer the softly, softly approach I talk about above, the following closet organization ideas can all be completed in 10 minutes or less and will help to makeover a section of your closet.

Sometimes, life happens, and your beautifully organized closet will get neglected for a week or so and the rot sets in. You put one pile of laundry in the wrong place and then you can’t sort the next pile until the previous one has been dealt with, so you leave it in your bedroom and soon, clothing chaos has returned and you’re feeling stressed.

I know, it has just happened to me. I’ve had a rubbish month – my house got burgled (wow what a mess) and my dog died – so keeping up with putting laundry away in the right place just didn’t happen.

I’m now working my way through the following ideas so I can regain control of the situation:

  • Make or find a Donation Station (an old cardboard box or shopping bag will do).
  • Declutter one drawer or shelf. Kids clothes especially can benefit from a regular sort through.
  • Turn all your hangers the wrong way round to start off your ‘do I wear it in a year’ test.
  • Sort your clothes by color and/or type.
  • Refold and stack the clothes from one drawer or shelf.
  • Make sure your most worn items are front and center of the closet. Move everything else to the back or side with the least used items the furthest away.
  • Pull out all the empty hangers and place them together on the hanging rod or better yet next to the iron.
  • Scavenge around your house for items that could be repurposed as closet organizers: think boxes, baskets, drawers. Plan to pretty them up with the kids at the weekend if need be.
  • Move off season items into empty luggage to keep them out of the premium space within your closet.
  • Sort your bedding into sets and store each one in the relevant pillow case.
  • Collect up your shoes and put them back in the right place.
  • Install some command hooks on the back of the door for belts, scarves, hats, jewelry etc.
  • Fix up some battery power lights for any dark corners or shelves.
  • Get your label maker out and mark up those boxes and baskets with exactly what’s inside.

Back to top

Go beyond the rod with closet organizers

Closet organizers have flooded the market lately – you can find whole systems made of wire or wood as well as individual organizers such as hanging organizers made from fabric, and you can also use regular storage favorites such as storage bins and baskets to help bring some order to your clothes, shoes and accessories.

Closet rods need company. Give them an organizing friend.

But which ones are a good buy?

The best closet organizers are easy to install, affordable and will maximize the available space in your closet. The following are the basic essentials:

==> Please click IMAGES for full range <==

Closet doublers or double hangs
Closet DoublerImmediately double the hanging space available in your closet with these simple organizers. Just hang them on the top rod and voila you’ve got a bottom rod too. These are ideal for blouses, skirts and pants. Don’t forget to leave some long hanging space though for your dresses.

Hanging closet organizers
Shelf space is a necessity in any closet for things like sweaters that do not store well when hung. If your closet is the ‘rod only’ type, a hanging strip of fabric shelves is the perfect ‘quick fix’ answer. Just wrap the velcro around the rod and you’ll be maximizing the vertical space in your closet. Hanging closet organizers come in various configurations with some including cubbies for shoes and drawer inserts as well as sweaters.

Shelf dividers
Closet Shelf DividersStop your piles of sweaters teetering and collapsing in on one another when you remove an item with shelf dividers. They’re like bookends and hold each pile in place independently of the surrounding clothes. They are perfect for giving easy access to each pile and an overall neater look.

Over the door organizers
Over The Door Closet OrganizerThere are various racks and fabric pocket organizers that can be hung on the back of your closet door, making the most of that otherwise dead space. There are those designed specifically to hold shoes, belts and jewelry as well as multi-purpose organizers to store anything you choose.

Storage containers and baskets
Storage BasketThese generic storage options are as much at home in your closet as anywhere else. They corral items keeping them neat and protected and like items together. They come in various sizes so can store sweaters, off season clothing or belts and purses. They can be labelled if they are not clear and are ideal for storing things on hard to reach shelves. They can also help your closet look more attractive.

Drawer dividers
Drawer DividersCreating smaller areas within your drawers is handy for separating out items such as underwear and belts. They come in a variety of designs including modular compartments that can be interlocked to your design, spring loaded wood or plastic inserts that expand to fit and section off your drawers as well as collapsible boxes for bras and socks.

Tip: whilst not strictly an organizer, why not consider lining some part of your closet wall with corkboard. You could then pin up necklaces and other jewelry, clothing receipts and magazine clippings with inspiring fashion ideas.

When to buy

Buying closet organizers is a bit of catch 22. You don’t really know what you need until you have emptied your closet and decluttered. But then, just as you’re ready to put everything back to clear the bed or the floor, you have to go shopping for organizers.

If you buy your organizers before emptying your closet and decluttering, you’ve little idea of whether you need more hanging space, shelves, baskets or specific organizers and how many of each.

One answer maybe to work your way through your closet decluttering but without emptying everything out. That way you can assess what is left and what organizers you need, without leaving your bedroom in chaos while you go out shopping.

In order to save money, you should have a plan before your credit card comes out. Remember the more time you spend planning, the less money and time you will spend later.

Once you have assessed what you have and what you need, take some measurements and then look around your home. You may find that you have things you can repurpose, such as dressers, plastic drawer sets, hooks, MDF for more shelving, curtain poles for more hanging rods, boxes, baskets etc. You can always paint things or cover them in craft paper to pretty them up.

The best way to save money on organizers is to have less to organize, so be ruthless in your decluttering.

Back to top

Pimp your closet

An attractive closet is one that will inspire you to put things back where they belong.

Add some wallpaper to get a chic, boutique look. See before and after pictures via Tissuepapers.

Line your shelves with cute paper (click here for a ‘how to’ on using contact paper via PrettyHandyGirl.com) or shelf liners.

Use pretty boxes for your odds and ends like these at AThoughtfulPlaceBlog.com.

Throw in a rug under your shoes like this one at ThriftCore.com.

Throw away all those horrid wire hangers that ruin your clothes and mismatched others that you’ve been collecting for years and opt for uniformity with matching huggable hangers. They are ultra thin so space saving, and velvet so they look after your clothes.

Invest in a closet deodorizer to absorb the musty odors caused by stagnant air.

Back to top

How to organize a small closet

Move stuff out

In addition to following the advice above, the key to organizing a small closet lies in getting most of your clothes and accessories out of it.

Here are some ideas so you can see what I mean:

  • Be brutal with your decluttering. You don’t have the space to try the ‘backwards hanger’ trick so the ‘love it, wear it, feel good in it’ questions become even more important. Feel good about being generous with your donations. Remember your trash maybe someone else’s treasure.
  • Practice the “one in, one out” regime for anything new that you buy and donate something old for every new item.
  • Move out your off season clothing. Store it in your empty luggage. Use under the bed storage containers. Buy or make some attractive storage boxes and fix up some high shelves running around your bedroom.
  • Shift your shoes into under the bed containers. Consider bed risers to give that extra bit of room under there.
  • Transfer your bedding or towels into attractive storage ottomans. These could be used as décor in your bedroom, bathroom or even the living room.
  • Clear out your fancy bags and purses. Use them to decorate your bedroom by displaying them on shelves.
  • Find other attractive storage options and use them in unusual ways to store items of clothing. Who would have thought jeans would look good in a wine rack?

Photo credit: Chris Eckert/Studio D via Cosmopolitan.com

Organizers are your friend

After moving everything out of your closet that you possibly can, you will be left with everything else. To maximize the small amount of space you do have, you will need some closet organizers.

If you just have a closet rod, install a shelf above it with some dividers. If you have a spare wall, again install some shelving or just some command hooks for scarfs, hats and belts.

Sort your clothes into long hanging and short hanging. Below the short hanging use a closet doubler or move in a chest of drawers, a shoe rack or a laundry basket with handles that can be carried to the washing machine.

Fit more into your hanging space by using hanger cascaders.

If you have spare hanging space, buy a hanging closet organizer to add more shelves, drawers or shoe cubbies.

Use a shoe rack for closets or cheap plastic totes to store your shoes on the floor. If you have any spare floor space, use more boxes or baskets to store belts and other accessories.

Make use of the back of the closet door with an over the door organizer. These can hold anything from shoes, to belts, to jewelry and more.

Back to top

How to organize a closet on a budget

With the huge range of cheap but quality closet organizers available these days, there is no need to spend thousands organizing your closet.

Just check out our $50 closet organizing project to see how to overcome the common closet problems of not enough shelves, not enough hanging space and messy shoe chaos, very easily.

Even the big closet system brands such as ClosetMaid have economy options leaving you with no excuse for a messy closet. This system gives you 10 feet of hanging space and 13 feet of shelf space all for less than $40.

Cheap Closetmaid Closet Organizers

But if you prefer or need to spend your time and creative skills on your closet organizing rather than any of your money, we’ve previously written about 11 ideas for how to organize a closet for free.

Back to top

How much do custom closets cost?

If you have some cash to splash and are considering investing in a custom closet (I say investing as closet organization systems can increase the value of your house), here is an idea of what one will set you back:

  • $100 to $600 for a DIY organizer
  • $2,500 to $5,000 for a custom installation.

Source: WhatItCosts.com

Back to top

How to design a closet system

If you have had enough of your current closet organization system and have the time and budget to start afresh with multiple hanging rods and shelves, here are some tips on what to do.

Step 1
After decluttering, assess your clothing inventory.

Step 2
Break your items into the following categories: long hanging (eg, dresses); short hanging (eg, blouses, skirts, pants); sweaters; linen; items that require drawers (eg, underwear); folded items (eg, t-shirts); shoes (make a separate note of flats, heels and boots); hats, purses, jewelry and other accessories.

Step 3
Measure your closet wall(s) – both height and width and draw a rough sketch. This form might be useful.

Note: your closet will need to be at least 22″ deep to hang clothes.

Step 4
Work out how much hanging space you need as well as how many shelves and drawers you need to be able to store everything that you have.

Note: apparently you need approx. 1.5″ of closet rod space for every item you want to hang, although this seems like a lot to me.

Step 5
Play around with your sketch until you can fit in everything that you need in a sensible manner. Make sure to include high shelves for items that are not used very often and keep long hanging off to one side unless dresses are your everyday wear. Make the best use of space by placing hanging poles under high shelves.

Note: the height for a dress rod is usually around 65″. Double hanging rods work best at 42″ and 84″. Shelves usually start 16″ from the floor and are 12″ high for normal shelves, 7″ high for shoe shelves and 16″-18″ high for linen.

Step 6
When you are happy with your design, you can take your measurements and plan to your local hardware store or online retailer and order away.

Here is how this sketch of the right hand wall looks in real life:

Photo credit: Rubbermaid Products.

Online design tools

If sketching is not your thing, then various closet manufacturers such as Rubbermaid and Easy Closets have online design software that guide you through how to design a closet organizer. Obviously they are aimed at people who want to buy their products but can still be very helpful planning tools if this is not your plan.

They guide you through the process of closet design. You can choose between walk in closets, reach in closets and open walls. You enter in your wall dimensions and select the various components of a closet organizing system and place them where you like. You can move them around and add and delete items as often as you like. Some of the standard configurations that they suggest you start with are also very helpful. (See image to the right.)

Typical components include wire shelves, hanging rods, wicker or canvas baskets, wooden shelf and drawer units as well as shoe shelves and cubbies.

Tips

You will probably get all caught up in the design of your actual organizing system, but there are other components to an efficient closet that should not be overlooked. So don’t forget:

  • lighting – a dark, dingy closet is no use to anyone. Check out this FreshHome.com article for tips on lighting your closet.
  • a mirror.
  • a floor covering – wood, vinyl or carpeting might be best for bare feet first thing in the morning.
  • air flow – mold and mildew breed in still air so be sure to plan for something like a small bathroom fan or a dehumidifier.
  • keep bugs at bay with cedar freshners or socks filled with cedar shavings and fragrant herbs such as lavender and rosemary. Hang them on closet rods or tuck into drawers.
  • optional extras – a seat, a place to iron.

Back to top

How to build a closet organizer

If you learn how to make a closet organizer system on your own it will work out a lot cheaper than paying a custom closet manufacturer to come to your home, assess your needs, measure up, provide a design and install the units. But going the DIY route means you have to do all these activities yourself.

A closet organization system will typically comprise hanging rods, shelves and accessories such as drawers and baskets. There are two main ways to build such an organizer: from a prefabricated kit or by purchasing supplies from your local hardware store and building from scratch.

Prefabricated kits

Kits are generally the quickest and simplest solution for many. They only require basic DIY skills and tools, are fairly customizable and very versatile.

Modular kits, such as those from Rubbermaid, are pre-cut and come in standard sizes with holes drilled where necessary. All the necessary mounting hardware is also included. You order the individual components to suit your design, mixing and matching to get the best fit, which are then delivered to your door. When the kit arrives, you follow the manufacturer’s step by step instructions for quick and easy assembly and installation. This is the most affordable method.

One step up from modular kits are custom DIY kits. A few internet based manufacturers, such as EasyClosets, allow you to design your custom closet using their online software. They then make up the components and ship them to you with instructions for installation. Taking accurate measurements is obviously paramount for success using this method.

Building from scratch

Smart planning and a simple design are key here. You will also need more advanced DIY skills and tools (such as a pretty good woodworking shop) than for installing prefabricated kits. The upside is though that your design can be very customized.

Here you would start by designing your closet system making sure to take account of where your studs are and what supports the shelves will need. After determining and purchasing the necessary supplies, you will install the vertical tracks and brackets for the shelves, the shelves themselves and the hanging rods.

Back to top

How to build closet shelves

Before you start buying any materials you need a good plan. Think about shelves for sweaters, shoes, baskets for accessories and everything else you hope to store away neatly. Then grab a pencil and paper and sketch out your design. Take measurements (3 times to be sure!), decide how many shelves you can fit in (making sure they will be tall enough for what you want to put on them) and write a list of all the supplies you will need.

Check out this article at DoItYourself.com for more specifics.

Vertical track and bracket shelving

If you are installing wire shelving, make sure you locate your vertical tracks over a stud to give them the greatest possible strength. If you can’t find the studs, use drywall anchors at the very least. Draw lines on the wall (using a level!) to mark where the shelves will go and then follow the manufacturer’s instructions for installing the hardware. You shouldn’t need to go outside of their guidelines as the systems are often very versatile allowing you to customize as much as you like.

For custom wood closet shelving, you will first need to choose between BC graded plywood (one side smooth, one side rough), cabinet grade plywood (veneered top layer giving a more professional finish but more expensive) or laminated shelving (again veneered, often come in depths that match pre-made shelf supports, no need to seal, paint or stain).

After cutting your wooden boards to size, you then need to install the vertical tracks and shelf supports as for wire shelving. The track and shelf support system is very flexible as you can move the supports up and down as need be in the future without having to re-mount the track. Now paint or stain your shelving if need be before setting it into place.

Closet shelving units

If you want to build a closet shelving unit rather than use a track and bracket system, click here for a good resource that explains how to cut the plywood, build the shelves, fix the shelves and sand and install the finished unit.

Here’s another very quick video showing how to make closet shelves:

Click here for another resource for creating a fully shelved closet.

Back to top

Useful and interesting resources

Back to top

5 Great Places To Use Baby Wicker Baskets In Your Nursery

Setting up your nursery is such a fun experience, full of anticipation and excitement. But don’t just think about what looks the prettiest, go for function as well as style.

All mums-to-be will have two things on their mind – the safety of their imminent arrival and being able to cope with the life changing experience that is about to happen.

Wicker baskets for your nursery help create a safe environment for your baby as it begins to crawl, toddle and walk by eliminating clutter. They are also fantastic for storing and organizing baby items, making life with a new baby that bit easier.

In fact I think they are some of the greatest nursery organizers available.


Where to use baby wicker baskets

Your nursery can really be a haven for wicker baskets. They are ideal to use in all the functional zones in your nursery. Just think of each daily routine you will go through and what items your basket will need to hold close by:

Elephant Wicker Basket For NurseryThe changing area – use a few small wicker baskets to hold diaper essentials such as diapers, wipes and creams, as well as clean clothes, after bath items and perhaps a toy to keep your baby entertained. A larger wicker hamper located on the floor close by would also be ideal for popping laundry into as necessary. You couldn’t go wrong with this cute elephant from HomeDecorators.com.

The feeding area – again small baskets could be used here to hold burp cloths.

Next to the crib – medium sized baskets holding a few toys, stuffed animals and books would be useful. Perhaps they could be located on a bookshelf.

Under crib – larger baskets could be used in this otherwise wasted space to hold blankets, towels and bedding, especially if space is short in your baby closet.

Closet shelves – a mixture of sizes of baskets will suit different items that you might want to store in the closet – think clothes, bibs, bedding and toys. Those that are clearly labelled will help to make your closet organization elegant and simple.

Just make sure that you place them where their sense of charm can be appreciated and they can offer easy access to the items they are storing.


Here are some nurseries already using wicker baby baskets:

Wicker Baskets For Nursery


These nurseries could use some wicker basket help:


Our favorite options:

Wicker baskets make a fabulous catch all storage and organizing solution for your nursery, whilst being a decorative touch at the same time.

Don’t forget they also make the perfect baby shower gift set. They often come filled with baby goodies, but even if not, you know you are helping to bring some organization to the chaos that is often found in a home with a new baby.

Below are some of our favorite options in stores now.

==> Click HERE for full details on each item <==

5 Piece Wicker Basket Baby Nursery Storage Set

Matching 5 piece set with liners comprising 2 large and 3 small baskets. Ideal for a mixture of diaper supplies, clothes, toys and blankets.

Badger Basket 5 Storage Unit

A very stylish 5 Badger Basket storage unit to look great and provide easy access to toys, clothes and much more. Easy to put together (15 mins) but smaller than it looks at 38.25″ wide x 13″ deep x 23.75″ high.

Badger Baskets on changing table

Available in white, blue and pink, these 3 slightly different sized baskets nest nicely inside one another when not being used for diapers, shoes, socks, books and toys. Will look charming in any nursery.

NoJo Jungle Babies Wicker Basket

Perfect for a jungle themed nursery, these dark wicker baskets with attractive liners will look great on their own or come with a range of other NoJo Jungle Babies nursery items, including crib bedding, light switch plate, rug and wall decals.

Bear Wicker Baskets

Spruce up your plain baskets with these 3 pretty liners in baby bear, butterfly or paisley colors.

Enchanted Hollow Nursery Storage

Part of the Eddie Bauer Enchanted Hollow nursery collection, these brown wicker baskets with cute animal images on the liner, would make an attractive and useful addition to any nursery.

Pink Gingham Wicker Baskets

Blue Gingham Wicker Baskets

Gingham is often used in a nursery because it is cute and stylish. These sets of 2 baskets with drawstring liners are perfect for nursery organization, whilst looking great on any shelf, changing table or dresser.


Why wicker storage baskets for your nursery are so great

As well as being stylish, useful, versatile and above all affordable, they have many other advantages:

  • they come in many colors to co-ordinate with your decor, whether the color is from painted wickerwork or liners. White ones give off a sense of purity, newness and cleanliness, while those that are left in their natural state fit in anywhere. Blue and pink gingham liners are particularly popular.
  • they come in many different sizes and shapes offering endless storage options for everything in your nursery.
  • they are organic so environmentally friendly.
  • they are lightweight and portable, so can easily be moved around the room or the home.
  • they can be used in different ways as your baby grows.
  • they keep shelves neat.
  • they organize and conceal clutter.
  • some come with attractive liners that can be removed to be washed.
  • some come with adorable stuffed animal features or with liners that can be personalized.
  • if you can only find plain ones, you can personalize them yourself by painting them or by adding pretty bows and ribbons. This would be a good idea to tie the whole theme in together if you have a selection of different styles of basket.
  • they are most often not brightly colored like plastic boxes making them less attractive to crawling babies and toddlers.

As with anything, there are always disadvantages to one item over another. Wicker baby baskets are not able to be folded down like storage cubes and many do not have handles that make them easy to carry around.

What to look for

  • Nursery wicker baskets often come in sets and these are the items you should be on the lookout for. As you can see from above, a nursery full of wicker baskets will all get used, but tie in your decor with matching items.
  • Durability should be another top concern as good quality baskets will last for years. You can then re-use them for another baby down the line, transition them into kids room storage when your child gets a bit older, or use them in another area of your home altogether.
  • Those with tapered sides will allow the baskets to be nested when not in use.
  • Think about what you will be storing in each basket. This will help you decide which size or mixture of sizes of baskets will be most appropriate.
  • Decide which areas of the nursery could do with baskets that come with liners. Clothes maybe and toys to keep little hands safe from potential scratches.

I’d love to hear how you use baby wicker baskets in your nursery. Please leave me a comment.

Photo credits: brendan-c, 3Neus, mbaylor, kuripan, trec_lit, and 3Neus.