 I just love how cute these baby storage bins from Pottery Barn Kids look.
But I was less keen on their $99 price tag for a set of three. Yes they’re made of iron with an enamel finish, have a wooden grip and come with wall mounts, but really – $99 for three buckets?
Having said that, getting organized is a must when it comes to getting ready for your family’s new addition. Finding a proper place for things and getting them in order can be fun. And when you repurpose items from another part of your home in an unexpected yet imaginative way, it can be decorative too.
So how about making some of these buckets yourself?
When labeled and hung on a nursery wall what is usually thought of as a household cleaning supply becomes handy storage for those everyday items at just an arm’s length away from your changing table.
To make these handy nursery storage bins to hold changing table accessories you don’t have to spend $99. Try $30 instead. Doesn’t that sound better? Yes, you can make your own trio of trendy baby storage solutions for $30.
All you need to create this look is three milk pail type buckets made of either papier-mâché or galvanized steel, spray paint, acrylic paint and a stencil.
Before you begin you will need to decide which type of milk pail you wish to use. Papier-mâché is a more light weight option that will end up looking just like the heavier galvanized metal option.

==> Click HERE to see the full range <==
The only difference the weight will make is in how it will be mounted on the wall, if it will be mounted that is. A wall bracket can be used for either the papier-mâché or the metal bucket while a hook and wire hanger will only be a viable option for the much lighter papier-mâché version.
Now that you have chosen the bucket style of your dreams it’s time to get to work with the paint.
Choose a semi-gloss multi-purpose spray paint in the color of your choice.

==> Click HERE to see the full range <==
When applying the base color to the buckets be sure to only use the spray paint outside or in a well ventilated area. Laying down a layer of newsprint or craft paper is also a good idea for providing a clean, dry work surface. Follow the application instructions on the label of the spray paint product you have purchased to ensure optimal coverage.
Once the base coat layer, or layers as the case may be, is dry the next step is the labeling. The most simple or basic method would be to use a permanent marker or paint pen to free-hand the words or letters onto the front of the bucket or pail, however, unless your hand is steady and your penmenship impeccable, it might not be the most attractive method to use.
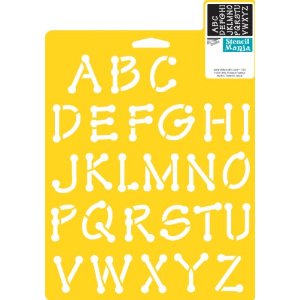
For the best lettering results alphabet stencils are the way to go. To hold the stencil in place, painter’s tape is excellent, that is unless you have an extra pair of hands to help with this step.

==> Click HERE to see the full range <==
Choose some acrylic paints in colors that coordinate with your baby’s room to be used for the lettering and the bucket’s trim. Remember a little acrylic paint will go a long way so only small tubes are needed.

==> Click HERE to see the full range <==
Place a small amount of paint onto a plastic or ceramic plate. When using stencils it is best to dip the sponge-tipped dauber into the puddle of paint so that only the flat tip of the sponge is saturated with paint. Before applying the paint to the stencil area be sure to remove excess paint from the sponge tip by dabbing the sponge on a clean paper towel. This will prevent paint from bleeding under the stencil and ruining the while thing.
Let the stencil paint dry for 10 to 15 minutes before removing the stencils as this will help prevent the paint from smudging. Once the base coat and lettering are completed the only thing left to do is the accent paint around the rim of the bucket. Just paint the top edge with some dark acrylic paint and leave to dry.
A wall bracket as previously mentioned can be used to mount the buckets on the wall. For a more versatile variation try placing buckets on floating shelves or across the top of a dresser or book shelf.
This project is very easy and inexpensive and the truly wonderful part of it is that no one will ever know just how easy and affordable it was unless you tell them!
Shopping List
Galvanized bucket 6qt x 3 = $19
Semi-gloss multi-purpose spray paint = $7
75ml tubes of acrylic paint = $1
Alphabet stencil = $2
Sponge-tip stencil tool = $1
Total = $30
The total cost with papier-mâché buckets would be much less.
I’m linking up to these blog parties:
The Shabby Nest
Chic On A Shoestring Decorating